Hey everyone! Sorry that this late but we've been busy busy in JoJo land. It was tax return time so we bought a lot of stuff that was needed for the house, and a lot of stuff that was not so needed. Now this recipe doesn't have pictures, but that doesn't mean it's not good.
Ingredients:
4 tilapia fillets
Juice and Zest of 1 lime
1 tablespoon of olive oil
1 1/2 tablespoons of honey
1/2 teaspoon pepper
1/2 teaspoon of garlic powder
1/4 teaspoon of chili powder
1/2 cup of flour
Olive oil for frying
Combine lime juice and zest, olive oil, honey, pepper, garlic, and chili powder in a larger zip-lock bag. Add tilapia fillets and let marinate for at least 1 hour. You can let this sit for a day but with it being fish I would not do it any longer than that.
When fish is ready combine flour with some salt and pepper (if wanted) and lightly cover tilapia with flour on both sides. Heat about 2 tablespoons olive oil, and cook about 4 minutes on each side; until the flour becomes and nice brown. You don't want to flip or move around too much.
See?! Look at that easy recipe. And very tasty. We served with some brown rice and some asparagas on the side. Yum!!!!
xoxo
Alyssa JoJo
Showing posts with label Alyssa JoJo. Show all posts
Showing posts with label Alyssa JoJo. Show all posts
Wednesday, February 20, 2013

Monday, February 11, 2013
JoJo's Lasagna
Hello everyone! This week we are making lasagna and let me say
– mine turned out to be a fail. Not taste wise, it was very tasty, but
all together structure wise it didn’t turn out. I’m still posting
it though, if only to show that you can always work with the food that turns
out in a way that you completely didn’t want. First I’m going to
start with the recipe for the lasagna alone. I tried doing something that
I’ve been seeing online a lot, where you replace the noodles with
zucchini. Here we go!
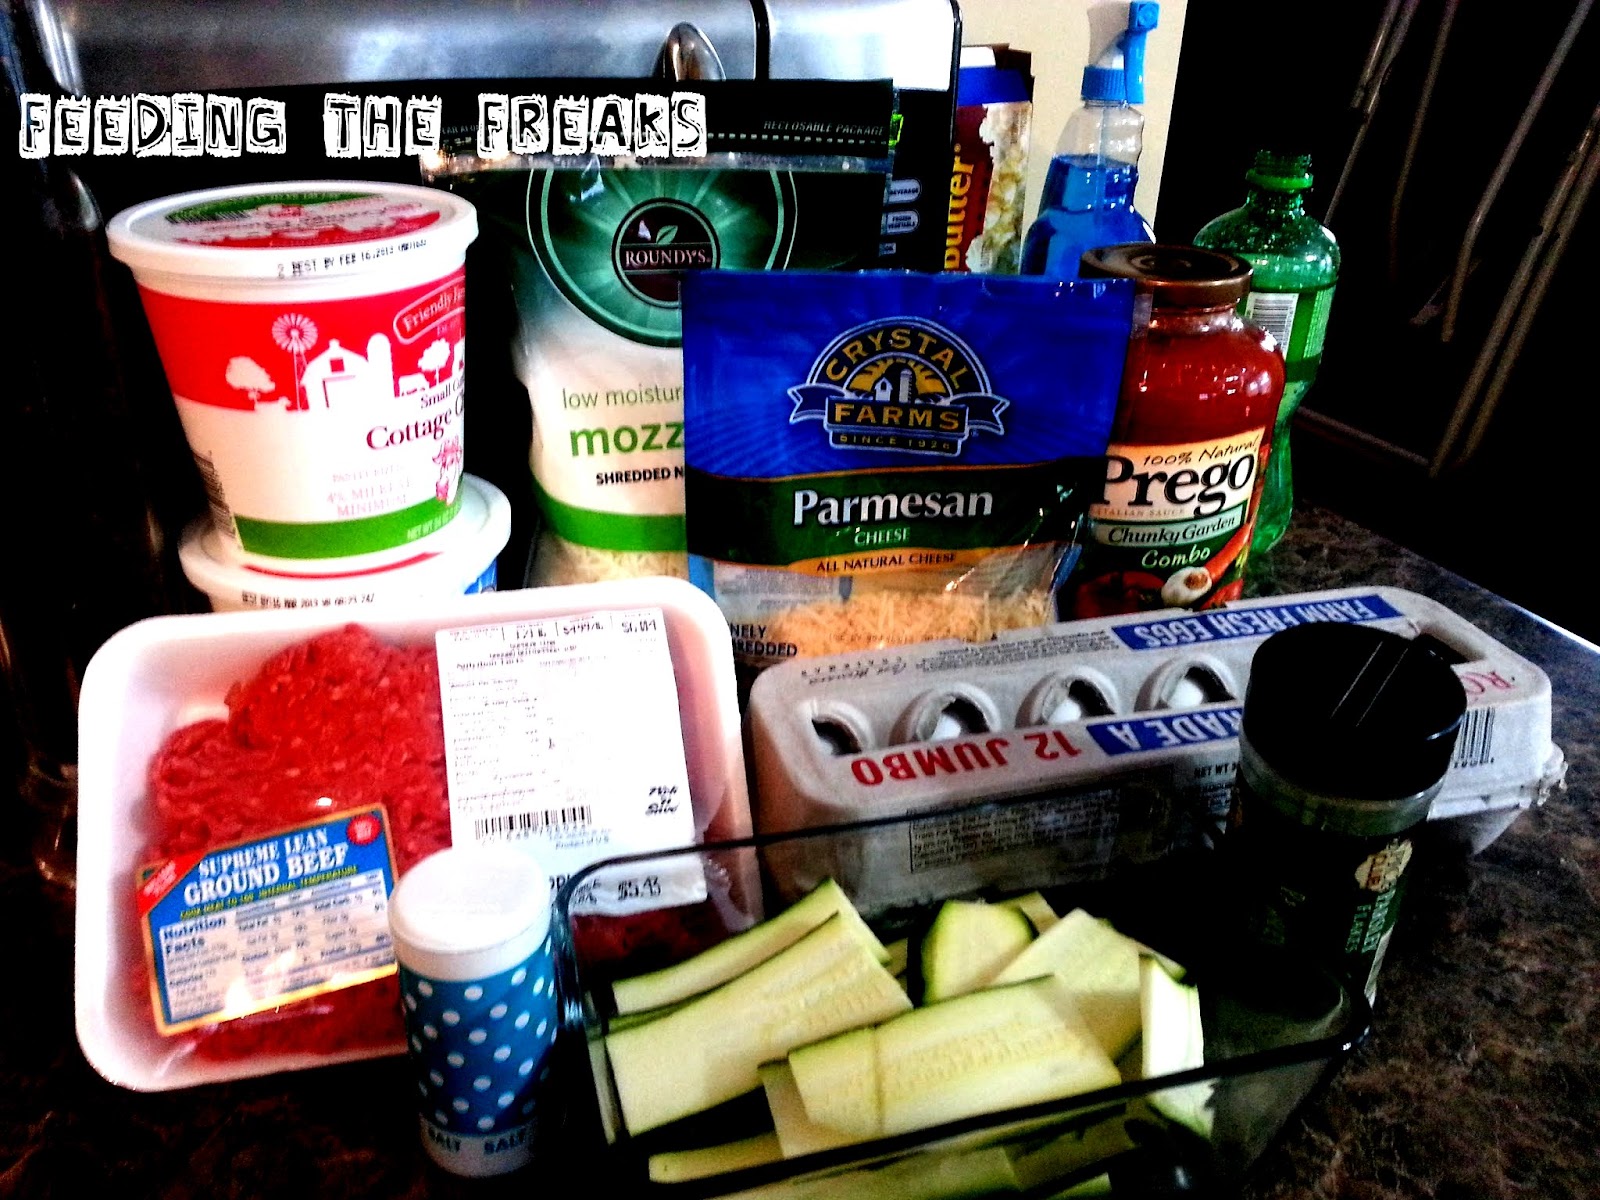 Ingredients:
1lb lean ground beef (Can use turkey if you’d like)
45 oz jar of spaghetti sauce
2 cloves of garlic, minced
32 oz of cottage cheese
4 cup mozzarella cheese, shredded
2 eggs
½ cup grated parmesan cheese
2 teaspoons dried parsley
Salt and Pepper to taste
4 medium to large zucchinis

First we will start with the zucchini! Now if you have a
tool like a mandolin this is where your job gets easy. I personally don’t
have one so I used a simple knife to cut it up into decent sized slices. You
might have to come back and do this – I at first only cut up two and
found that I needed to use four for mine.

Next we will put the ground beef into a decent sized pot and
brown it. I added a little bit of salt and pepper in when I did this part. Once
it’s fully cooked drain all the grease and put back into pot.

Now add the spaghetti sauce and the minced garlic in with
the ground beef. Mix the ingredients well while bringing to a slight boil. Once
it hits the boil bring down to a simmer and let cook for five minutes.

While the beef mixture cooks preheat your oven to 450
degrees. Grab cottage cheese, half of the mozzarella cheese, both eggs, half of
the parmesan cheese, the parsley, and the salt and pepper. Mix well and set
aside until the beef mixture is done.

Take enough of the beef mixture to have a thin layer
covering fully a 9X13 pan. Then layer some of the sliced zucchini to cover the
bottom as best as you can.

Now layer some of the cottage cheese mixture and then some
of the beef mixture. To figure out how much you should use figure out how many
layers you want. I did two layers so I did half and half. You will then put on
another zucchini layer and continue until you run out of both mixtures. Top
with remaining mozzarella and parmesan cheese.
Bake for 45 minutes.


Now look at that finished product… yup it pretty much
looks like soup. The BBB (aka Big Burley Boy aka the bf) and his pop still ate
it up. Seconds and all – but it just was NOT right. It bugged me so I
plotted how to fix it and after much thought I figured out how to. I boiled a
pot of macaroni noodles that I had left over from the mac n cheese night. As
those were boiling I pulled all the zucchini slices from the lasagna and
chopped them up to smaller chunks. I put them, the lasagna mixture, added about a
tablespoon of chili powder, some garlic powder, salt and pepper, and heated it
up. By the time the noodles were done the lasagna soup was fully heated up.
Mixed it all together and voila! We ate that with a side of ghetto cheesy
garlic bread and it was an amazing dinner.
So, keep in mind, Freaks....every meal is not going to be a win-win situation. There will always be instances in which a new recipe just FAILS for some reason or another. It is the truly adaptable cook who can take a fail and turn it into a WIN. Sometimes the conversion becomes a new family favorite, so go for it...you never know what is awaiting you!
So, keep in mind, Freaks....every meal is not going to be a win-win situation. There will always be instances in which a new recipe just FAILS for some reason or another. It is the truly adaptable cook who can take a fail and turn it into a WIN. Sometimes the conversion becomes a new family favorite, so go for it...you never know what is awaiting you!

Wednesday, February 6, 2013
Easy Peasy Mac-N-Cheesy
Easy Peasy
Mac-N-Cheesy
 Mama Lanette loves macaroni and cheese! Alyssa JoJo loves macaroni and cheese! Being the
homegrown Midwestern foodie freaks they are, the cheesier, the better. Everybody loves a good homemade macaroni and
cheese recipe, and this one is super easy! Well, actually, Grandma JoyJoy doesn’t care
for macaroni and cheese. I guess it has
something to do with growing up in the days when Catholics never ate meat on
Fridays, (blah blah, Catholic guilt,
blah, blah) not just during Lent as we are
apt to do in modern times…if even then (sorry Baby Jesus!). Even so, Mama Lanette and Alyssa JoJo did not
let Grandma JoyJoy’s dislike deter them from an intense love of the
Mac-N-Cheese. Oh no!
We moved far beyond the blue box blues, with its artificial neon orange
powder, and into a world of naturally-hued tangerine dreams.
Mama Lanette loves macaroni and cheese! Alyssa JoJo loves macaroni and cheese! Being the
homegrown Midwestern foodie freaks they are, the cheesier, the better. Everybody loves a good homemade macaroni and
cheese recipe, and this one is super easy! Well, actually, Grandma JoyJoy doesn’t care
for macaroni and cheese. I guess it has
something to do with growing up in the days when Catholics never ate meat on
Fridays, (blah blah, Catholic guilt,
blah, blah) not just during Lent as we are
apt to do in modern times…if even then (sorry Baby Jesus!). Even so, Mama Lanette and Alyssa JoJo did not
let Grandma JoyJoy’s dislike deter them from an intense love of the
Mac-N-Cheese. Oh no!
We moved far beyond the blue box blues, with its artificial neon orange
powder, and into a world of naturally-hued tangerine dreams.
Ingredients

1 pound box dried pasta. Once again, Mama Lanette likes the fun shaped
stuff, much like a small child.
1 can cheddar cheese
soup
4 cups shredded
cheddar cheese. I prefer sharp
cheddar, but use whatever you have on hand or prefer. You can even go with something other than
cheddar if you want to get crazy!
1-1/2 cups milk
or half-and-half
1 cup Panko bread crumbs
Salt and pepper to taste
Preheat oven to 350 degrees
 Bring a large pot of water to boil and add pasta. Cook according to package instructions. Drain.
While pasta is cooking, in a large bowl, combine milk and
the can of cheddar cheese soup. Stir to
combine. Add salt and pepper if
desired. Mix in shredded cheese.
 Add drained, cooked pasta and combine gently until all
ingredients are well incorporated. Spoon
mixture into a baking dish; 4 quart or cake pan size. Top with Panko bread crumbs. Bake for 25 minutes. Turn oven on broil for a couple minutes if
you want a nice brown top.
Add drained, cooked pasta and combine gently until all
ingredients are well incorporated. Spoon
mixture into a baking dish; 4 quart or cake pan size. Top with Panko bread crumbs. Bake for 25 minutes. Turn oven on broil for a couple minutes if
you want a nice brown top. 
Bam! Ain’t that a nice looking pan of mac? And YOU made it, so you can control what goes into it, and even better, what is going into the little tots’ bellies. Use skim milk instead of whole or half-and-half if you want to cut the calories a bit. I’m not saying this is a healthy dish, but sometimes food just tastes and feels better when you made it yourself and can attest to the ingredients.
Next week, freaks! <3 Mama Lanette

Monday, February 4, 2013
Alyssa JoJo's Mac-N-Cheese
I think we can all agree that mac n cheese is one of the most amazing things around. Once you walk away from the chalky version that comes in a blue box, a completely new world of what macaroni and cheese IS MEANT TO BE opens up in front of you, and yes, golden gates and singing angels are included.
This week Mama Lanette and I both attack mac n cheese. This is a recipe I've been making for a couple of years now and has made me a total Mac N Cheese snob. Everyone I have fed this to has drooled over it, and I personally think that it's super super easy to make. (Mama Lanette thinks that her's is easier but I think she's starting to get old and senile) So bring out your noodles and find what version you like most!
 Ingredients:
8 oz elbow macaroni
8 oz cheddar cheese (shredded)
12 oz small curd cottage cheese
8 oz sour cream
1/4 c grated Parmesan cheese
1 c dry panko crumbs
1/4 c butter, melted
Salt and Pepper to taste

Bring a large pot of water with a little bit of salt to a boil and then add macaroni. Stir occasionally until noodles are fully cooked. Drain and put back into large pot.

Preheat oven to 350 degrees. Mix together cheddar cheese, Parmesan cheese, cottage cheese, and sour cream with noodles. Put into any pan that you would like. I did a large muffin pan with a mini bread pans. Before that, all I used was a 9X18 cake pan. Just do whatever makes sense to you.

Melt butter and mix with panko crumbs. Sprinkle over the mac n cheese for a nice crispy crust.

Bake at the 350 degrees for 30 to 35 minutes. Bring out a big bowl and eat as much as you can. Goes well with a nice green side. (We did broccoli bites.) And if you make this, please tell us what you think! xoxo Alyssa JoJo
This week Mama Lanette and I both attack mac n cheese. This is a recipe I've been making for a couple of years now and has made me a total Mac N Cheese snob. Everyone I have fed this to has drooled over it, and I personally think that it's super super easy to make. (Mama Lanette thinks that her's is easier but I think she's starting to get old and senile) So bring out your noodles and find what version you like most!

8 oz elbow macaroni
8 oz cheddar cheese (shredded)
12 oz small curd cottage cheese
8 oz sour cream
1/4 c grated Parmesan cheese
1 c dry panko crumbs
1/4 c butter, melted
Salt and Pepper to taste

Bring a large pot of water with a little bit of salt to a boil and then add macaroni. Stir occasionally until noodles are fully cooked. Drain and put back into large pot.

Preheat oven to 350 degrees. Mix together cheddar cheese, Parmesan cheese, cottage cheese, and sour cream with noodles. Put into any pan that you would like. I did a large muffin pan with a mini bread pans. Before that, all I used was a 9X18 cake pan. Just do whatever makes sense to you.

Melt butter and mix with panko crumbs. Sprinkle over the mac n cheese for a nice crispy crust.

Bake at the 350 degrees for 30 to 35 minutes. Bring out a big bowl and eat as much as you can. Goes well with a nice green side. (We did broccoli bites.) And if you make this, please tell us what you think! xoxo Alyssa JoJo
Thursday, November 15, 2012
Mandarin Orange Salad
 One of the Thanksgiving side dish mainstays in Mama Lanette’s family of freaks is a Mandarin orange salad. It is a yearly request, nay, demand by both Alyssa JoJo and Grandma JoyJoy. I am NOT allowed to experiment with anything new…ever. Alyssa JoJo would not touch this when she was growing up, and one year she decided to “try it” (as she said with her freckled nose all scrunched up). Her post-taste thoughts? “I’m only mad that I went so many years NOT eating this!” While the combination of fruit mixed with vegetables sounds odd to many people, it seems to be much more common on restaurant menus now than in the past (spinach and strawberry salad is my personal fave, but arugula with cherries and pistachios is a pretty close runner up). Almost everybody who tries this salad loves it, and because of the “tiny oranges”, children are more apt to give it a shot. I’ve altered this a bit from the original; using red onion and flavored vinegar rather than green onions and plain vinegar, but the end result, no matter which version is made, is delicious. Oh, and I also use green leaf rather than iceberg lettuce (see lettuce rant below).
Lettuce Rant! I cannot post this in good faith without including a small rant regarding iceberg lettuce. Iceberg lettuce has zero nutritional value, as well as zero taste. It is nothing but water and turns rusty brown within minutes of chopping. It serves no purpose whatsoever as far as I am concerned. Stop buying that crap, freaks!!! Get yourself some green leaf or romaine. Buy a bag of mixed baby lettuces. Anything, anything other than iceberg lettuce! When I go to a restaurant and order a salad and they bring it to me with iceberg, I literally want to throw it at the server. These days, before ordering, I ask what kind of lettuce they use. Yes, it results in some odd looks, but I just don’t care anymore. The SOB would be more than a little irked if he had to pick Mama Lanette up at the po-po station because of a lettuce-induced public fiasco. Also, seriously people? Stop being a salad racist! In the words of the wise and hysterical Margaret Cho, “This is not the salad of my people.” Just because it has Mandarin oranges on it does NOT mean you can call it an Asian salad. Do we call a hunk of tasteless iceberg lettuce drowned in Ranch dressing and Bac-O’s a Caucasian salad? I think not. Leave the salads out of the compartmentalizing process that seems to be the norm, and just eat them. They are delicious and good for you…enough said.
Mandarin Orange Salad Ingredients
 Sugared Almonds
½ cup sliced almonds
3 tablespoons white sugar
Salad Base
½ head green leaf lettuce
½ head romaine
1 cup celery, chopped
½ small red onion, very thinly sliced into half rings
1 11 ounce can mandarin oranges, drained (If I know a lot of kids will be around, I put two cans of mandarin oranges in. It keeps them from picking all the oranges out, leaving none for the serious salad eaters.)

Dressing
½ teaspoon salt
Dash of black pepper
¼ cup extra virgin olive oil
1 tablespoon parsley, chopped
2 tablespoons white sugar
2 tablespoons vinegar, for this post, I used Raspberry blush vinegar, but red wine, balsamic, pomegranate, apple cider, virtually any kind of vinegar will work…just use what you have or what you like, and you will not be disappointed.
Dash of hot sauce (such as Tabasco), or not. I’ve found it really doesn’t make a difference in the flavor of the dressing.

In a small pan over medium heat, cook almonds and sugar, stirring constantly until almonds are coated and sugar dissolved. Watch carefully, as they WILL burn easily. Listen up, freaks, I know this from personal experience and am trying to spare you the frustration of a failed sugared almond experience. You can stand there and stir and stir and stir, it will look like it is doing nothing, and as soon as you turn your back to throw back a slug of Riesling, bam…burnt nuts! If this part of the recipe seems like too much work for you, you can purchase honeyed almonds, or just use plain sliced almonds. No shame included…I’ve done it myself upon occasion. Cool and store nuts in an airtight container.

Mix all dressing ingredients and chill. For me, the easiest way to blend dressing is to place all ingredients in a jar or plastic storage container that has a screw top lid. Once all ingredients are added, shake, shake, shake, shake it like a Polaroid picture, hey ya! (I really miss Outkast, what happened to them?) It will separate, as oil and vinegar naturally will, but you know what? Shake that bitch up again! That is the beauty of the process, no whisk or special emulsifier needed…just an old jelly jar or screw top plastic storage container (the Ziploc brand are rather spectacular for preventing leaks, I must say).
Mix lettuces, celery and onions in a large salad bowl. Now, regarding the lettuce…if you want to use only romaine, then do so. If you want to use only green leaf, then do so. Use any lettuce and any combination of lettuce that is easiest for you…except for iceberg. Please don’t make me come over and go Reservoir Dogs on your ass.
Just before serving, top with oranges and almonds. Toss with dressing. Sit back and watch the wondrous splendor that flits over your guest’s faces after they have chewed and tasted their very first bite. As an aside, if you serve this salad to a large group of peeps, some of whom have had it before, and some of whom have never had it before, let the never hadders get their servings first. I’ve found that once it is set out for eating, the Mandarin orange salad lovers swoop over it like birds of prey over roadkill, leaving nothing but a lone shred of lettuce and perhaps an onion slice in the bowl.

Stay tuned over the weekend and early next week, fellow freaks! Alyssa JoJo and I have a plethora of last minute ideas for you! <3 Mama Lanette
Friday, November 9, 2012
Beloved Brussels
 I am a lover of the
Brussels sprout! There, I’ve said it! When I am wandering the local farmer’s market
in the late summer/early fall and see those little babies for sale (still
attached to their stalk in many cases), I literally squeal in delight. They are an extremely underrated and
unnecessarily disliked vegetable, and I think it is due from past generations
of mothers over boiling them into an avocado-green colored mush. Perhaps this was so they matched the 70’s avocado-colored
kitchen appliances so popular at the time, as I remember many veggies being
served with the same unappealing greenish hue when I was a child (broccoli and
green beans included). The accompanying
smell of an overcooked Brussels sprout is not very appealing, nor appetizing. To be quite honest, it smells like ass. However, a properly cooked Brussels sprout
tastes and smells nothing like its
overly cooked counterpart. If you like
cabbage or asparagus, you will like roasted Brussels sprouts. I would promise this, but I know many of you
have preconceived hatred toward them and swear you will not like them no matter
what…so be it. My sister and I actually
used to call them baby cabbages when we were little, and that is how I got
Alyssa JoJo to eat them when she was a tot.
Really, putting the word “baby” in front of anything implies something
special is about to come, don’t you think?
I am a lover of the
Brussels sprout! There, I’ve said it! When I am wandering the local farmer’s market
in the late summer/early fall and see those little babies for sale (still
attached to their stalk in many cases), I literally squeal in delight. They are an extremely underrated and
unnecessarily disliked vegetable, and I think it is due from past generations
of mothers over boiling them into an avocado-green colored mush. Perhaps this was so they matched the 70’s avocado-colored
kitchen appliances so popular at the time, as I remember many veggies being
served with the same unappealing greenish hue when I was a child (broccoli and
green beans included). The accompanying
smell of an overcooked Brussels sprout is not very appealing, nor appetizing. To be quite honest, it smells like ass. However, a properly cooked Brussels sprout
tastes and smells nothing like its
overly cooked counterpart. If you like
cabbage or asparagus, you will like roasted Brussels sprouts. I would promise this, but I know many of you
have preconceived hatred toward them and swear you will not like them no matter
what…so be it. My sister and I actually
used to call them baby cabbages when we were little, and that is how I got
Alyssa JoJo to eat them when she was a tot.
Really, putting the word “baby” in front of anything implies something
special is about to come, don’t you think?
 Anyway, Brussels sprouts
have become a repeat Thanksgiving dinner side dish over the past few years with
me and mine. Some people eat them, some
don’t, but they are always available.
Anyway, Brussels sprouts
have become a repeat Thanksgiving dinner side dish over the past few years with
me and mine. Some people eat them, some
don’t, but they are always available.
If you think Brussels
sprouts may be something the diners at your Thanksgiving table will appreciate,
please try this recipe! It is incredibly simple. If you don’t have the oven space, you can prepare
them in a skillet instead of roasting in the oven. I have even made them on the grill with
positive results. The squeeze of fresh
lemon juice and sprinkling of parmesan really complements the sprouts and pulls
all the flavors together.
Ingredients:
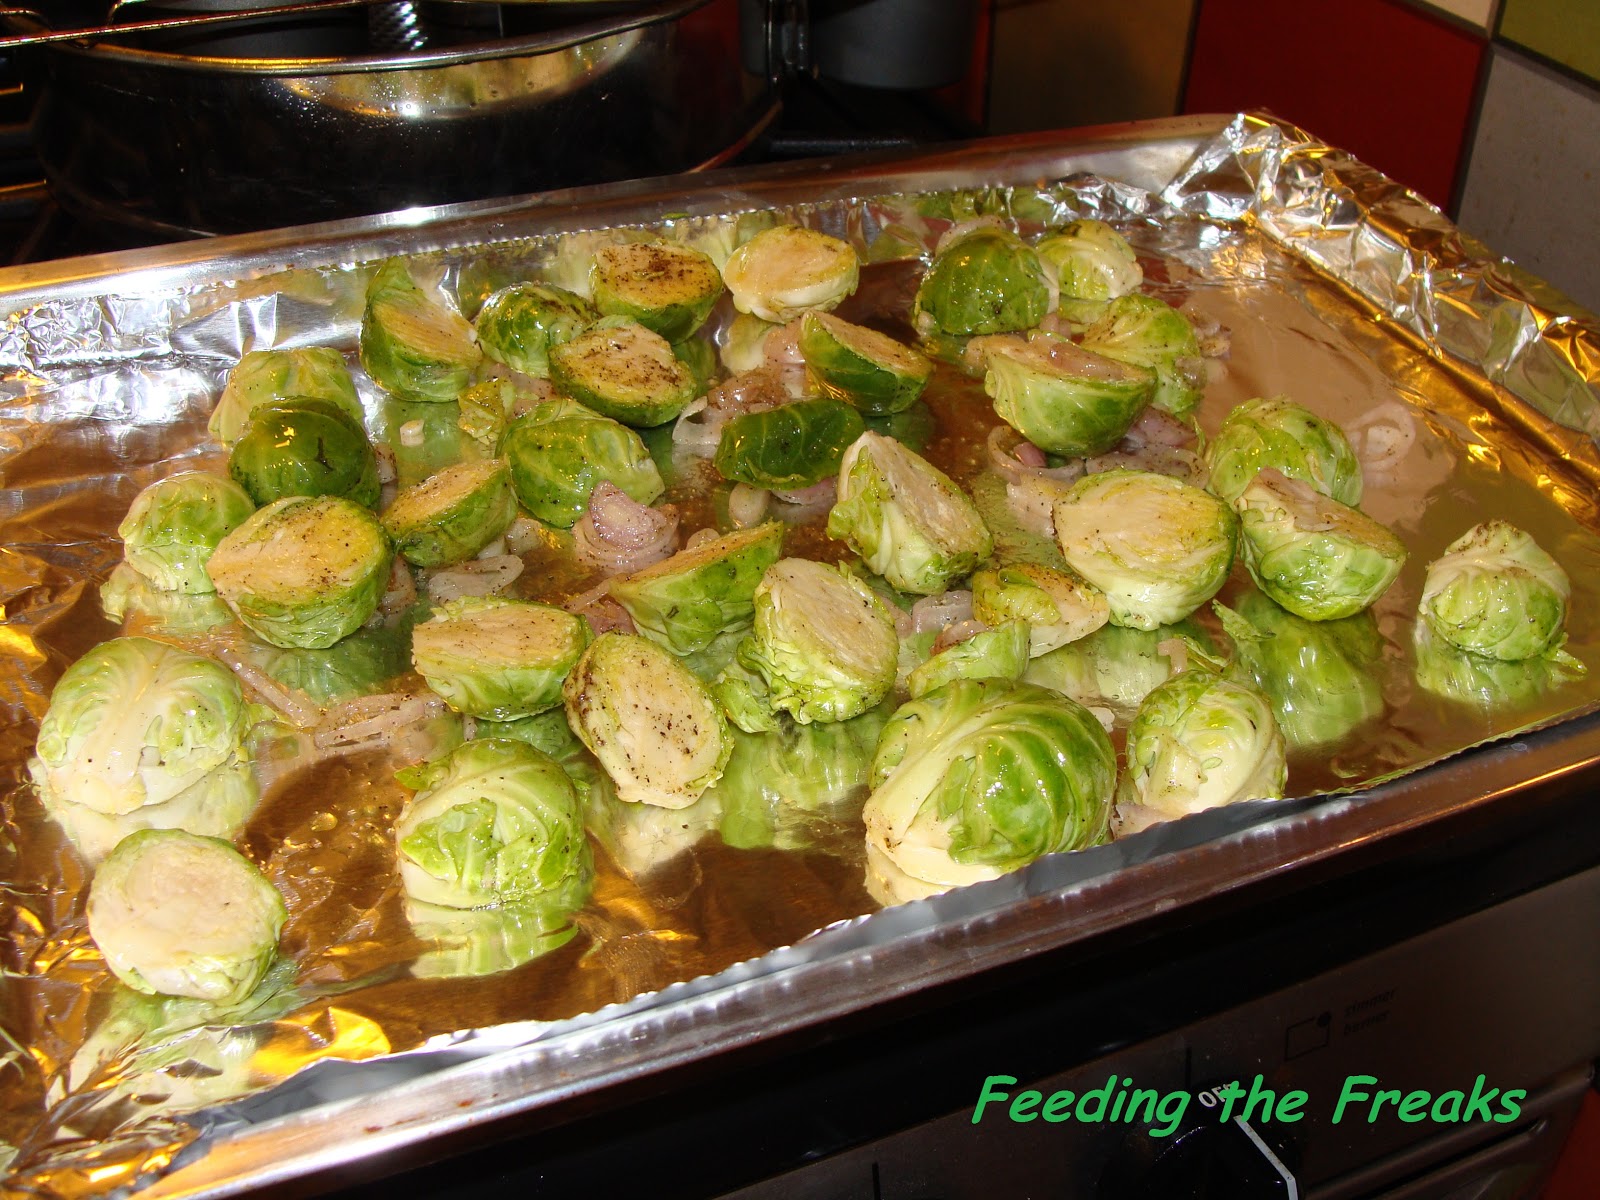
 1 pound fresh Brussels sprouts,
cleaned and halved
1 pound fresh Brussels sprouts,
cleaned and halved
1 shallot, sliced
2 tablespoons olive oil
1 lemon
¼ to ½ cup Parmesan
cheese, shredded
Salt
Pepper

Preheat oven to 450
degrees. In a large bowl, toss Brussels
sprouts, shallot slices, olive oil, salt and pepper to taste. Spread on a baking sheet and roast for
approximately 30 minutes, until Brussels sprouts are browned and starting to
get crispy. You can cook them longer if
you want, as the crispier they are, the more flavorful they become, but be
careful not to burn them.

Tip: If you don’t have a shallot or know what one
is, you can use a small white onion, but the shallot is well worth the
effort. They brown up nice and crispy
and have a spectacularly mild flavor that compliments the sprouts. I highly recommend them, although they can be
a bit pricy in some areas, so if you use a nice sweet onion, it will work also.
Next week, fellow freaks! <3 Mama Lanette

Friday, November 2, 2012
Thanksgiving Diatribe
Here
in the Midwest, summer is officially over, Halloween is done and gone, the
trees are bare, and it is dark at 5 p.m.
This is most certainly not my
favorite part of the year. I much prefer
temperatures in the 80’s and sun until 9 p.m. over below zero temps and the
cold, icy dark before even getting home from work. Fortunately, there is a handy distraction
that is called “the holiday season,” and it is well underway. Mama Lanette and Alyssa JoJo always hit their
true foodie personas and start planning the Thanksgiving meal at the stroke of
midnight on November 1. (ring…ring…”Hello?”, “Oh my God, I got the new *insert food magazine title here* Thanksgiving
Edition in the mail today!!”)
 This
is OUR holiday. Mama Lanette has been
making a Thanksgiving Dinner for Alyssa JoJo since 1990, and before that, Mama
Lanette’s mother, Grandma JoyJoy, prepared a splendid meal. Being from Wisconsin, Thanksgiving has always
been a fairly testosterone-free holiday, as Hunting
Week is the week of Thanksgiving, and the men in the family were always up
north deer hunting. Although it was only
my mother, my sister, and me at home, we always had a full blown Thanksgiving
meal all the way down to polishing the silver and setting the china on the
formal dining room table. Thanksgiving
is something we have never skimped on, and the tradition has been firmly
implanted into Alyssa JoJo’s soul.
This
is OUR holiday. Mama Lanette has been
making a Thanksgiving Dinner for Alyssa JoJo since 1990, and before that, Mama
Lanette’s mother, Grandma JoyJoy, prepared a splendid meal. Being from Wisconsin, Thanksgiving has always
been a fairly testosterone-free holiday, as Hunting
Week is the week of Thanksgiving, and the men in the family were always up
north deer hunting. Although it was only
my mother, my sister, and me at home, we always had a full blown Thanksgiving
meal all the way down to polishing the silver and setting the china on the
formal dining room table. Thanksgiving
is something we have never skimped on, and the tradition has been firmly
implanted into Alyssa JoJo’s soul.  Today
our Thanksgiving holidays are more fun than ever, as instead of two generations
in the kitchen, there are now three, adding an extra element of family bonding
and fun. Each of us has a role in preparing the meal; Grandma JoyJoy cleans and does the nasty stuff to
the turkey that causes Mama Lanette to start gagging and run from the room,
prepares a pie or two, and gets some rolls rising to throw into the oven. Alyssa JoJo makes her special green bean
casserole (which is NOT your basic cream of mushroom soup and canned beans of
the past) and does random tasks such as setting up the appetizer table and
making sure it stays stocked with goodies.
Mama Lanette prepares side dishes and appetizers galore. Mama Lanette’s sister brings desserts and
appetizers, or whatever item seems to be missing from the menu. The SOB even has a role in our day. Some would say he has the most important role
of all: Liquor Store Trip Maker.
Today
our Thanksgiving holidays are more fun than ever, as instead of two generations
in the kitchen, there are now three, adding an extra element of family bonding
and fun. Each of us has a role in preparing the meal; Grandma JoyJoy cleans and does the nasty stuff to
the turkey that causes Mama Lanette to start gagging and run from the room,
prepares a pie or two, and gets some rolls rising to throw into the oven. Alyssa JoJo makes her special green bean
casserole (which is NOT your basic cream of mushroom soup and canned beans of
the past) and does random tasks such as setting up the appetizer table and
making sure it stays stocked with goodies.
Mama Lanette prepares side dishes and appetizers galore. Mama Lanette’s sister brings desserts and
appetizers, or whatever item seems to be missing from the menu. The SOB even has a role in our day. Some would say he has the most important role
of all: Liquor Store Trip Maker. Testosterone
is back with the introduction of boyfriends, in-laws, and SOB’s into the
family. A pre-dinner appetizer open
house began a few years ago for family members and friends who have other
obligations but still want to stop over and have a cocktail and snack. It is
a holiday that is open to anyone who wishes to make the journey, involving as many
friends as family. It is a fun and relaxing day that ends with all of our butts
and guts groaning due to the very large food babies firmly lodged in our
stomachs, the added weight testing the support structure of the living room
furniture. To this date, no piece of
furniture has ever broken under the increased stress of a Thanksgiving dinner
in this house; however, I cannot say the same for my Auntie’s home at
Christmas. Almost every damn year a
chair in her dining room breaks, and every year I exhale a sigh of relief that
it wasn’t me.
Testosterone
is back with the introduction of boyfriends, in-laws, and SOB’s into the
family. A pre-dinner appetizer open
house began a few years ago for family members and friends who have other
obligations but still want to stop over and have a cocktail and snack. It is
a holiday that is open to anyone who wishes to make the journey, involving as many
friends as family. It is a fun and relaxing day that ends with all of our butts
and guts groaning due to the very large food babies firmly lodged in our
stomachs, the added weight testing the support structure of the living room
furniture. To this date, no piece of
furniture has ever broken under the increased stress of a Thanksgiving dinner
in this house; however, I cannot say the same for my Auntie’s home at
Christmas. Almost every damn year a
chair in her dining room breaks, and every year I exhale a sigh of relief that
it wasn’t me.
So,
in case you haven’t figured it out yet, this is the official kickoff of the Feeding
the Freaks…Thanksgiving Edition!
Join us this month as we share some of our most beloved recipes of the
past, and newer recipes that we have researched and/or created just for
you! It is going to be a month full of
history and history in the making, so stay tuned fellow freaks! You won’t regret it! <3 Mama Lanette

Thursday, November 1, 2012
Yummy Mummies

So, Mama Lanette had a Halloween Potluck at her day job today, which required a lot of extra thinking and creativity. After all, the Feeder of the Freaks cannot show up at her Halloween Potluck with just any old thing! I have a reputation now, and I must live up to it…(tapping pencil) what to do…what to do???
Being the Midwestern, raised-on-beer-with-a-frighteningly-high-alcohol-tolerance, good-time gal that I am, the first thought that came to mind was Caramel Apple Jello Shots. Sounds delish, but alcohol at the work place is somewhat discouraged (watch for this recipe in the very near future, though). Peanut butter eyeballs? Eh, been there, done that. After days and days of ruminating and pondering, a black light bulb suddenly popped on over my head! Mummy bread! If people can turn bread dough and fillings into stuffed braids, why can’t the braid also be altered to look like a bandaged up mummy? Oh, the possibilities!!! What to stuff them with? Savory or sweet? Fruity or chocolate? Meat filled or (oh, the horror!) vegetable filled?
Well, as Mama Lanette does when faced with indecision, she sighs, takes a very deep breath, blindly dives in, makes many of each, and hopes for the best. The end result? A delicious Apple Yummy Mummy and a Pizza Yummy Mummy; both of which were well received at the potluck, and formally named Yummy Mummies. The Pizza Yummy Mummy won favor hands down, though. (The SOB ate an entire Pizza Yummy Mummy the evening before while Mama Lanette was experimenting.) The Pizza Yummy Mummy disappeared from the potluck table in 10 minutes flat, which is something spectacular because the people I work with can make some REALLY TASTY FOOD. The Apple Yummy Mummy, while delicious, was surrounded by several competing delectable desserts, so there was a bit of that one left. Finding the lucky recipient to take the remainder home was a fairly simple task, however. I really didn’t want to bring it home, as I’m still recovering from the Minnesota State Fair Feeding Frenzy of 2012.
Once the technique of the dough is grasped, the number of Yummy Mummies flavor possiblities is endless. They can virtually be stuffed with anything you would want on a pastry, pizza, taco, etc. Anything that tastes yummo on top of bread is just as delish inside of bread. It can be as simple or as complicated as you choose to make it. Make your own dough, buy frozen bread dough, or use cans of poppin’ fresh refrigerated dough. Whatever kind of dough you use, the end result is going to be one heck of a yummy mummy! Below are the recipes for the two I made and brought to work; however, BE CREATIVE, fellow freaks! If you keep listening to what I tell you to do and follow my advice blindly, I may just develop a superiority complex, and trust you me…nobody who knows me wants that to happen…ever.
 Apple Pie Yummy Mummy Ingredients (makes 1)
1 pound frozen bread dough, thawed (I used Rhodes brand sweet bread dough)
1 can apple pie filling
Powdered sugar for dusting
Two eye shaped things, like chocolate chips, toasted almonds, maraschino cherries, etc.
Egg white
Pizza Yummy Mummy Ingredients (makes 1)
1 pound frozen bread or pizza dough, thawed (I used Rhodes brand pizza dough)
½ to 1 cup pizza sauce, depending on how well you like pizza sauce (I’m a saucy kinda gal)
½ pound hot Italian Sausage, browned and crumbled
½ package sliced pepperoni, or 1 diced pepperoni link (comes in a package of 2 links, but they last a long time, so don’t worry about the extra going bad…or just make two of the damn things, for crying out loud.
½ pound mozzarella cheese, shredded or very thinly sliced. To make things even easier, go yet yourself a package of preshredded mozzarella. They come in conveniently premeasured 8 ounce bags, which coincidently equals ½ pound.
1 black or Kalamata olive, sliced lengthwise
Egg white

For any mummy you choose to make, the assembly and baking steps are the same. First of all, if using frozen, thaw your bread dough and let rise until doubled. Punch that bitch down and roll it out into a rectangular shape, about the size of a cookie sheet. If using the canned refrigerated dough, simply pop the can open and roll or use hands to shape to size. Preheat your oven to 350 degrees.
 Once dough is rolled out into its rectangular shape, spread filling(s) down the center lengthwise, about 1/3 the width of the dough itself (take a deep breath, I have photos, okay?)
Decide which end is going to be the mummy head, and about 3 inches down the side from that, use a paring knife and cut 6 diagonal slits (about 1 inch wide each) down each side of the mummy dough. Leave about 2-3 inches at the “feet” end if possible.
 Wrap the sides of the head end in first, then fold over the top flap. After that, carefully criss-cross the slits across the top of the mummy, pinching seams as you go. When you get to the foot end, fold ends the same as with the head end. Using your hands, carefully mold into a more mummy like shape, indenting at the head and feet ends.
Once you are done shaping and pinching seams in the dough, brush with egg white. Yes, I realize many of you freaks have no idea how to separate an egg, much less own a basting brush for anything other than BBQ’ing, so you can skip this step if you must, but try to at least brush the Yummy Mummy with some melted butter or give it a shot with some nonstick cooking spray. It gives a nice color to the finished product and promotes browning, okay? After brushing or spraying, place two chosen objects (olives, cherries, almonds, etc.) on the head area for eyes.
 Place into the preheated oven and bake for approximately 30 minutes, less or more depending on how browned you like your bread.
 After removing from oven, dust with powdered sugar, sprinkle with parmesan cheese, or whatever you feel like doing to make it more decorative and mummy looking.
Lessons learned/tips/tricks/ideas:
Make sure your dough is pinched tight before brushing with the egg white or basting with butter/oil. I made a Yummy Mummy that had cream cheese and raspberry filling, brushed it with the egg while there were still gaps, and the thing came out of the oven looking like a Frankenstein’s zombie monster/weird alien worm thing. Seriously…it was embarrassing.
I think Mexican flavors would really do this justice. I envision Yummy Mummies filled with salsa, cheese, beans/chicken/taco beef, olives, etc. Take that Taco Bell and your sadistic, yet delicious, Doritos Locos Taco!
How cool would this look as a Christmas tree? Yep, already making plans….
An End to End a Season:
 So, sadly, another Halloween season has come to an end. I know you are all very concerned and wondering, what does that mean? How will that affect Feeding the Freaks? Should I be worried? Well, fellow freaks, Mama Lanette and Alyssa JoJo have only three words…Thanksgiving and Christmas! Woot woot! Join us in November for TG delights galore, and in December for all sort of ideas for parties and family gatherings. We have stacks and stacks of food magazines, along with the world wide web to surf, and we will do our best to find/create the finest and freakiest holiday creations for you to share with your loved ones.
Next week, fellow freaks! <3 Mama Lanette
Monday, October 29, 2012
Spaghetti Brain (Braided Spaghetti)
Now if you're like me you are addicted to Pinterest... and that is exactly where I got this idea. There are plenty of things you can do with this to make it fun for Halloween. Like coloring the dough red or anything along those lines. Now this recipe isn't as picture heavy as our normal ones just for the fact that I was baking so many things at the time that I totally forgot to take some of the pictures. But this is something that is totally worth making. Everyone loved it and it was way easier than I thought it was going to be.
Ingredients:
1 loaf of frozen bread dough. (I used Rhodes)
6 ounces of spaghetti, cooked
1 cup of thick spaghetti sauce
8 ounces of mozzerlla cheese
Parmesan cheese
Parsley flakes

First thaw out your loaf of bread. Place some flour on a table and slowly roll out the dough until it's about the same size as a cookie sheet. This may take some time since the frozen loaf already has it's shape - but if you take your time with it, it will soon flatten out.

Once your dough is flattened out, lay it on a cookie sheet, and with a pair of kitchen scissors cut some slices on the edge; making sure they are about 1 inch thick tabs. We will be using these to make the braided look once the bread is full. Lay about half of the cheese down, then the cooked noodles, then the spaghetti sauce, and end with the remaining cheese.

Once everything is layered in on each end take your end tabs and lay them straight down over the spaghetti. Then take the remaining tabs on the side and slowly layer them over each other to make them look braided. Sprinkle with Parmesan cheese and parsley flakes.

Bake at 350 degrees for around 30-35 minutes. (Until the bread is a nice golden brown) Cool slightly and then cut into 6 pieces for serving.
Now, like I said there are many things you can do to this recipe to make it yours. Add pepperoni and do it pizza style. You could do chicken, broccoli, and cheese to veer from the Italian mood completely. No matter what this is something that will always be delicious, and the people you feed it to will believe that you spent a lot of time making them dinner! It's a win win situation.

Ingredients:
1 loaf of frozen bread dough. (I used Rhodes)
6 ounces of spaghetti, cooked
1 cup of thick spaghetti sauce
8 ounces of mozzerlla cheese
Parmesan cheese
Parsley flakes

First thaw out your loaf of bread. Place some flour on a table and slowly roll out the dough until it's about the same size as a cookie sheet. This may take some time since the frozen loaf already has it's shape - but if you take your time with it, it will soon flatten out.

Once your dough is flattened out, lay it on a cookie sheet, and with a pair of kitchen scissors cut some slices on the edge; making sure they are about 1 inch thick tabs. We will be using these to make the braided look once the bread is full. Lay about half of the cheese down, then the cooked noodles, then the spaghetti sauce, and end with the remaining cheese.

Once everything is layered in on each end take your end tabs and lay them straight down over the spaghetti. Then take the remaining tabs on the side and slowly layer them over each other to make them look braided. Sprinkle with Parmesan cheese and parsley flakes.

Bake at 350 degrees for around 30-35 minutes. (Until the bread is a nice golden brown) Cool slightly and then cut into 6 pieces for serving.
Now, like I said there are many things you can do to this recipe to make it yours. Add pepperoni and do it pizza style. You could do chicken, broccoli, and cheese to veer from the Italian mood completely. No matter what this is something that will always be delicious, and the people you feed it to will believe that you spent a lot of time making them dinner! It's a win win situation.

Subscribe to:
Posts (Atom)